may find this useful BEFORE signing a Ryan Homes sales contract:
Ask to have in your own hands a print out of the Master Selection Sheet listing all options and prices for the home model you are about to buy. Until you see this document, you are at a great disadvantage as the SR knows all the possibilities, and you know only what they tell you.. Use this document to figure out your exact options and get them into the sales quote, then start negotiating a price.
This is a sheet you will get AFTER you sign, and will show you options you may really want but did not know existed, so you never asked for. But when you see it after signing, you may like some of these options, and may add it within the two weeks grace period where you make changes, but you will add it at full retail price and it will not be part of your negotiation since you already signed a contract and locked a price.
But seriously, do not ask for this until you have narrowed down your selection to the model you really want and after deciding you really want to build this home in this development.. It is rather exhaustive and steals much of the SR's thunder, so please be kind and if you are 'just looking,' this document is not for you..
Monday, February 1, 2016
Monday, September 2, 2013
the house that ryan built
We moved in mid August when Ryan finished building our house.. Thank you all for your kind words and support through this process. Thank you for sharing pictures of your homes with us, where we reposted various elevations under the Pictures tab. It was impossible for us to see what the house would look like based on an architect's drawing, but we are truly blessed to have it turned out like it did, a place to call home.
Saturday, August 31, 2013
Ryan Homes Electrical Issues and Advice
Didn't really drop off the map, just didn't have as much interesting stuff to share. But a response elsewhere prompted me to elaborate further on Electrical issues we had.. This post hopes to share our frustration and issues to help others avoid such problems. We know Ryan Homes are reading these posts, and we hope someone takes this customer feedback and incorporates it in creating better logical flow of the electrical layout and design process. Please understand that similar issues can be easily avoided early on and throughout if one understands the simple facts below...
1. Ceiling Lights
There are many rooms that do not come with standard ceiling lights. Study your electrical maps and find out which rooms do not have a ceiling light or ceiling light rough in and add one, it is impossible to regret such a decision. You'll be happy every time you walk into a room and flip a switch and have instant light. Even if Ryan would argue that you have "switched outlets"..
2. Switched Outlets and Lamps/lights that you plug...
These are flipped (upside down) outlets with the top being controlled by a light switch on the wall, and the bottom being always active/live. This is how Ryan Homes expect you to have light in your house.. "Plugin light fixtures are so lovely!" they say, well, maybe, but what if you have kids who will be tripped by wires and will trip fixtures in their general roaming of the house? Also, not even 4 plugins will light a room like a single good smartly placed ceiling light.
AND electricians have zero common sense because outlets by code (at least where we are building) should be within 6 feet from the entrance of a room, and then spaced 12 feet apart, so that you are always within a maximum of 6 feet of an outlet. But this designation makes for very strangely placed outlets. Such as a switched outlet in the middle of a wall 20 feet long, where you'll definitely place a couch or a TV, and not a plugin light. So that outlet will become useless, or cumbersome to attach a light to if you have to use one.
Or, look at switched outlets in a bedroom, instead of having such outlet near a corner of a wall as to connect to a light on a night stand, nope, electricians will place that outlet smack in the middle of a wall, effectively killing usage of that outlet or making it dangerous to use especially if you have little kids and worry about them tripping over the wires or knocking lights down.. Obviously it would make too much sense to place that outlet near a corner..
Or if you add another switched outlet to a master bedroom, watch out to make sure the electricians don't place both so close together that they will be behind the bed posts or nightstands, forcing you to change the layout of your bedroom if you want to use those outlets.. And do yourself a favor and make sure the electricians didn't save you time and effort by linking the two outlets to a single switch, even though there is a dedicated switch for each light, but let's just control both lights with one switch and leave the other unused.. (True story x 2).
Anyone building with Ryan Homes must take great interest in, and become very familiar with, electrical layouts and diagrams of their houses and request changes as needed, AND continuously check the implementation throughout the build process..
1. Ceiling Lights
There are many rooms that do not come with standard ceiling lights. Study your electrical maps and find out which rooms do not have a ceiling light or ceiling light rough in and add one, it is impossible to regret such a decision. You'll be happy every time you walk into a room and flip a switch and have instant light. Even if Ryan would argue that you have "switched outlets"..
2. Switched Outlets and Lamps/lights that you plug...
These are flipped (upside down) outlets with the top being controlled by a light switch on the wall, and the bottom being always active/live. This is how Ryan Homes expect you to have light in your house.. "Plugin light fixtures are so lovely!" they say, well, maybe, but what if you have kids who will be tripped by wires and will trip fixtures in their general roaming of the house? Also, not even 4 plugins will light a room like a single good smartly placed ceiling light.
AND electricians have zero common sense because outlets by code (at least where we are building) should be within 6 feet from the entrance of a room, and then spaced 12 feet apart, so that you are always within a maximum of 6 feet of an outlet. But this designation makes for very strangely placed outlets. Such as a switched outlet in the middle of a wall 20 feet long, where you'll definitely place a couch or a TV, and not a plugin light. So that outlet will become useless, or cumbersome to attach a light to if you have to use one.
Or, look at switched outlets in a bedroom, instead of having such outlet near a corner of a wall as to connect to a light on a night stand, nope, electricians will place that outlet smack in the middle of a wall, effectively killing usage of that outlet or making it dangerous to use especially if you have little kids and worry about them tripping over the wires or knocking lights down.. Obviously it would make too much sense to place that outlet near a corner..
Or if you add another switched outlet to a master bedroom, watch out to make sure the electricians don't place both so close together that they will be behind the bed posts or nightstands, forcing you to change the layout of your bedroom if you want to use those outlets.. And do yourself a favor and make sure the electricians didn't save you time and effort by linking the two outlets to a single switch, even though there is a dedicated switch for each light, but let's just control both lights with one switch and leave the other unused.. (True story x 2).
Electricians may think that owners may obviously want to ALWAYS turn both lights on and off at the same time, because you and your soul-mate are so inseparable you do everything together at the same time.. (Being sarcastic).
3. Let's Talk Switches
Even less common sense here. Of course at this point I am wondering if it is just our electricians who have questionable common sense, but the theme seems universal from what I read on other blogs.
3. Let's Talk Switches
Even less common sense here. Of course at this point I am wondering if it is just our electricians who have questionable common sense, but the theme seems universal from what I read on other blogs.
Imagine opening a door and walking into a room.. Where would you expect to find the light switches? Certainly not BEHIND the door you just opened. Well, that's where it is in our master bedroom. It would make too much sense to place the switches out of the way of the open door, so you'd simply use them without having to close the door and hunt for the switches.
Electricians may have been wanting to do us a favor by keeping the switches safe and protected and hidden behind the door.
Again, zero common sense. And when you try to argue with electricians after drywall, they say, "there is one switch that's visible of the four switches on the plate, so it's not REALLY behind the door." Really?
And then you have other strangely placed switches.. We have a light rough in over a kitchen island. It would make too much sense to put the switch for it at the entrance of the kitchen, so the electrician hid it in the deepest most corner of the kitchen over the counter top, where you literally have to reach far over the counter top to use it. Again, it would make too much sense to stop and think, "Hmmm, perhaps this is not a good place for this switch!"
4. Grouping Switches
So if you have a set of switches serving a certain function (such as external flood lights), wouldn't it make sense to have them grouped together? Nope, obviously not, let's make sure to split them up into two groups.. Come on!
5. De-Grouping Switches
This is not against what I just said in 4, but just advice, if you have many switches in a room, do yourself a favor and have switches for switched outlets moved to a plate other than the one controlling ceiling lights and fan.. It becomes frustrating to enter a room and see an electrical panel of switches like those on the Starship Enterprise with 4-6 switches where you flip half the switches and nothing happens with most.. This issue can be avoided by requesting to group switches that control switched outlets on a separate plate than ceiling light an fan. Just a simple recommendation. Problem mostly observed in master bedroom and morning room, and wherever you add ceiling lights and fan rough ins and switched outlets.
6. One more thing about terminology
Words and terms are very important.. For example, while a switched outlet to Ryan Homes means an outlet with the bottom half always live/hot/active and top half switched on/off by a switch on the wall, the electrician may understand it as an outlet where both top/bottom sides are controlled by a single on/off switch, but the electrician will automatically follow Ryan Homes logic if outlet is in a bedroom..
So if you request a switched outlet on plant shelf by stairs landing (one always on to power a wireless speaker, and one switched for a night light, true story) guess which one the electrician will give you?
7. Fans anyone?
Make sure to add a ceiling fan rough-in to your bonus bedroom if you have one. You'll be very happy that you did, HVAC is always questionable in this room.. Also, if your SR or PM are smart enough (ours both are, thank you very much), they'll realize that the RH design for bonus bedroom includes BOTH recessed ceiling lights AND a ceiling light as standard, and will move the ceiling light if you wish to a room that doesn't have it, for free, or upgrade it to ceiling fan for a reduced price.
8. GFCI
If you pay for extra GFCI outlets (more expensive than standard outlets, double or triple depending on location), make sure the electricians don't short change you and use one actual GFCI outlet and link standard outlets to it and have all be 'protected' by the main GFCI outelt. In this setup if any outlet trips, the main GFCI outlet trips and kills all of your linked 'protected' outlets. If the main GFCI dies for any reason (of which there are many), then all the linked outlets will die as well. But if the electricians actually used GFCI outlets in every GFCI outlet location they are supposed to, then only the one that tripped will die and the rest will remain alive.. Imagine a sprinkler system control unit in a garage and all other outlets linked to a single GFCI outlet and a the main GFCI outlet dies, that grass won't be getting any water, and those power tools won't have power, and that radio will remain mute.. Besides, you already paid double or more for GFCI, why short change you? True story, sadly..
9. Pre Drywall Meeting: Check, Check, Check Again
As the house goes up, look at where the outlets and switches and light rough-ins are, especially as soon as the electricians wire up the framed house, well before drywall. Verify that the outlets are where you expect them to be, and that the switches are what you requested, and that any ceiling lights or fans are where you expect them to be. Point out issues and have them fixed before drywall, because it is incredibly easy to correct anything electrical at that point, but afterwards you will get an insane amount of push back from electricians and Ryan Homes on changes, basically no one wants to tear up drywall and rerun wires, it costs money.
Use the Pre-drywall meeting to inspect every electrical element of your house. You will be glad you did. We ended up with all the issues posted above at closing, even though we corrected many more while the house was still getting build. Had we not been involved and checking on things, we would have tens of issues instead what we ended up with..
Tuesday, August 27, 2013
Victoria Falls Price Increases
In a bit of surprising news, the last lot in this development phase went for sale for a starting price of about 40K more than six months ago, increasing base entry price for whole neighborhood.
There are other sides to this as price increase as I pointed out below. While instant equity and increased perceived dwellings value, and while feeling incredibly fortunate to have been able to score the house for the price we paid (not cheap at our maximum possible budget) and the interest rate we got, we feel bad for those having to pay so much more just to get in.. Granted the next phase will have more privacy with more woods behind it, better lots with higher ground elevations, and will be further back from the main street and all..
Another aspect is that currently almost the whole neighborhood is made up of younger families and their kids.. When prices in the next phase start rolling in at 100K more than what we bought at, can many many young families who are just starting afford homes in the 400K range in this part of Northeast Ohio? How is increased premium going to change neighborhood demographics?
Monday, August 19, 2013
Closed.. and Moved
Closing Meeting on August 19 of 2013 at 10 AM was nothing to write home about. Standard 100 pages or so of legal closing papers and signature. Were done a few minutes before 11AM and nearly financially broke.
Walked out and right into the Outback Steakhouse next door for the first time ever. Might as well celebrate for a few dollars more. The blooming onion thing looked great but was a lousy oily mess. Never again. Don't recommend it.
Now back to packing. We get the keys and move tomorrow.
Moved on August 20 of 2013
Moving was a major undertaking but worked out all right.
Reserved a 26 ft U-Haul truck and was prompted for Moving Help, which I didn't know about..
Anyway, we hired "Affordable Friendly Movers" through the site which basically ran us $175 for 3 hours for a 3 person crew and $50 an hour after that. Reservation was for 5 hours but actually ended up needing their help for 9 hours. Movers worked diligently and professionally to load our apartment, three storage lockers, along with an extra stop to load our storage facility furniture.. Final bill was about $500 for 9 hours of work and it was worth every penny. There is no way in hell we could have moved in a single day by ourselves, and we didn't need to call in any favors from anyone..
Fridge and washer and dryer arrived on moving day in the evening. Sears held appliances for us in warehouse for nearly 4 months, but eventually delivery and installation were lacking. They did not balance the washer and dryer. The fridge was not getting cold, despite what the Sears guy said about getting cool in two hours. Going through the manual showed that it was in demo mode, so it was an easy fix and it works fine.. Sears also managed to damage the freezer door handle in the delivery along with dings in door itself and it needs replacement. We called later and they came to replace it and rebalance washer and dryer..
Our entire master bedroom furniture fit into the bonus bedroom, and we are scratching our heads trying to figure out what to put in the master... such questions can be easily solved with money.. but that is a solution we'd like not to approach at the moment!
Friday, August 16, 2013
Demonstrated
We had a demonstration meeting today. The house is ready. We pay on Monday and get the keys on Tuesday.
It is amazing how much more beautiful a clean home looks after looking at it through months of mud and dirt and gravel and wood chips and drywall and paint and dust.
We are very pleased with how everything came out. Our PM went above and beyond in making sure all of our requests were met to make this house stand out in the best possible way. We always said John was a very nice guy, but this last week demonstrated how phenomenal the man is in trying to ensure the work is done soundly and to perfection. We were hard on him earlier but we should have realized that he was crushed by the load of building over a dozen homes at the same time. Trying to make all of these owners happy is a very tough task.
Did not take pictures except these two. Meeting lasted 3 hours. Will post more soon.


Tuesday, August 13, 2013
Pre Final Walkthrough/Demo Meeting (UPDATED)
Asking for a meeting a few days before the final walk through (Demo) meeting is absolutely one of the best tips we ever received. We asked for one a week ago and got it scheduled for this week, 4 days before the final walk though demonstration meeting.
We visited the house a couple of days ago and took extensive notes on issues that needed addressing. Met with the PM this morning and went over issues that we found. Where we had a strong case he did not even question it, and added it to his to do list. Some things we discussed and reached an agreement on. Others we agreed to revisit after scheduled work is done to see how much more work is needed.
This meeting made the difference between most critical items getting corrected before we move in, or after we move in, and we are glad our PM scheduled it..
Coming up...
Final Walk through Demo Friday 8/16
Closing will be on Monday 8/19
Transfer and Keys Tuesday 8/20
and some pictures... saving some critical shots for later..


Tuesday, August 6, 2013
Victoria Falls Loft and Bonus Bedroom pictures (UPDATED)
It seems the plumbers have been through the house. There is water and faucets and all that.. Toilet seats and sinks and stuff. Standard Ryan Homes chrome color everywhere, but the upgrade price was ridiculously high so we stuck with what's standard. The house has been painted too.. All the doors seem to be in. Stairs have been stained..
Kitchen: Lazy Susan corner only uses about half the space of the corner, there is a huge amount of space wasted behind it.. no one ever told us that.. see below for just added pictures.. No sign of the granite which was the main reason for the visit..
Driveway is poured and it is worth pointing out that it maybe under 4 inches high as it was formed with 2x4s all around. Walkway is poured too, here is a golden tip: pay extra and make your walkway 4 or 5 feet wide instead of 3, I am pretty sure we asked about that but did not stress it enough, who the hell remembers at this point! When you walk it in person it is easy to see that a 4 ft walkway makes much more sense.. Ryan Homes did not allow us to curve sidewalk to go into the side of the parking pad by the garage door like the model - this one I very clearly remember.. If you can't sell it to customers, don't offer it in the bloody model. Instead they poured it in a straight line into the driveway (not pad).. There is a stupid large triangular gap between sidewalk and side of garage parking pad. The driveway entering the garage is also about 3 inches under 18 ft.. Ryan Homes specs call for 18x27 pad, (see term R19 on page 3 of 8 of Victoria Falls rev 01 Master Selection Sheet).. There is plenty of gravel towards back of driveway and pad as they had to significantly raise the elevation, but I don't think there is as much closer to the street.
Can you tell I am not thrilled with Ryan Homes at the moment?
Just posting some pictures for the bonus bedroom and loft as it had been requested..


Entrance of bonus bedroom showing full bath, and room, which has a step down


Kitchen: Lazy Susan corner only uses about half the space of the corner, there is a huge amount of space wasted behind it.. no one ever told us that.. see below for just added pictures.. No sign of the granite which was the main reason for the visit..
Driveway is poured and it is worth pointing out that it maybe under 4 inches high as it was formed with 2x4s all around. Walkway is poured too, here is a golden tip: pay extra and make your walkway 4 or 5 feet wide instead of 3, I am pretty sure we asked about that but did not stress it enough, who the hell remembers at this point! When you walk it in person it is easy to see that a 4 ft walkway makes much more sense.. Ryan Homes did not allow us to curve sidewalk to go into the side of the parking pad by the garage door like the model - this one I very clearly remember.. If you can't sell it to customers, don't offer it in the bloody model. Instead they poured it in a straight line into the driveway (not pad).. There is a stupid large triangular gap between sidewalk and side of garage parking pad. The driveway entering the garage is also about 3 inches under 18 ft.. Ryan Homes specs call for 18x27 pad, (see term R19 on page 3 of 8 of Victoria Falls rev 01 Master Selection Sheet).. There is plenty of gravel towards back of driveway and pad as they had to significantly raise the elevation, but I don't think there is as much closer to the street.
Can you tell I am not thrilled with Ryan Homes at the moment?
Just posting some pictures for the bonus bedroom and loft as it had been requested..
This is how a Victoria Falls Elevation D rev 01 Loft will look like, bye bye giant walk in closet for Master bedroom. But it is absolutely worth it for all that extra light, and room.


Entrance of bonus bedroom showing full bath, and room, which has a step down


Below is the master bath, just trying to show the color of the faucets..

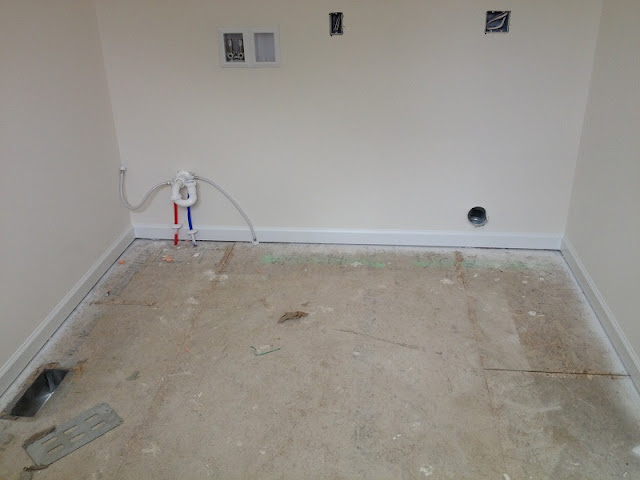
Here we have a shot of the office.. but as you can see we have turned it into a laundry room..
and the observant reader may see the laundry tub pipes are sticking out of the floor instead of the wall.. what the hell is plumber thinking? that no one will notice?
and the observant reader may see the laundry tub pipes are sticking out of the floor instead of the wall.. what the hell is plumber thinking? that no one will notice?

Finally, here are two pictures showing the wasted dead space behind the corner's lazy Susan..


Thursday, August 1, 2013
Full speed ahead?
With 20 days to go, went to the house yesterday to find out that it has been possessed by a crazy shock wave of progress. The pictures show what was done sometime between Monday and Tuesday. (Posting from phone for first time, results maybe unpredictable)


Friday, July 19, 2013
The House Rests
Not much to say except that the brick work is done on the exterior, but only half the shutters are installed. We were surprised yesterday when we went to the house and found some windows cannot be opened at all.. no up, no down. They are stuck unless you apply very serious force, and then don't move much. Perhaps half the windows in the house are like this now.. a few are cracked. It seems this house is really settling in full force, especially after brick and drywall.. Wondering if the weight of the brick in particular is crushing this little house. It turns out, apparently, not the case. This is a standard part of the building process. Houses settle, and windows get adjusted, replaced, and greased as needed.. all is well.
Sunday, July 14, 2013
Daredevilish Drywallers!
Drywall hangers started working Friday morning.. and were done sometime later on the same day.. An entire house drywalled in a single day.. and we thought the Amish were fast. Also the garage door was installed 4 days ago hours before we had 3 continuous days of torrential downpour. Our closing date is at least 1 week later now. Ticker thingy on the right has been updated.
Update: We found an extra large piece of R30 insulation on the basement floor. The only place R30 is used is the garage ceiling under the bonus bedroom, and we had seen that piece had fallen out earlier in the week before the garage door was in.. So I'm pretty sure the drywallers did not put it back in.. it.must.go.back!
Not many pictures today as most were taken with a real camera, but these below are from the phone. Certainly no external shots as we ran out of bricks and I'm saving the external shots to post together when the front is done!

looking from the kitchen into the extended family room with all optional windows..
morning room on left side, far right is entrance to office-now-laundry-room
morning room on left side, far right is entrance to office-now-laundry-room

upstairs hallway showing master bedroom, loft, and entrance of bonus bedroom

bonus bedroom entrance and full bathroom

bonus bedroom closet and windows
Tuesday, July 9, 2013
Promptus Pre Drywall
A
very busy time in the building process resulted in this delayed update.
We must start with a shout out for our PM for doing a great job and
addressing our concerns to the best of his abilities. Sometimes the man
is nothing short of a miracle worker, especially considering how many
homes Ryan has him building.
I have to say that everybody who commented on the previous post gets an A+++ for reading. I honestly expected many people to be flipping through blog posts and looking at pictures, but it seems everyone who read passed my little reading test. Ha! How about that!
I reached out to our PM after the last post and setup a meeting at the house to go over a few things. We met for a couple of hours in the morning and went over all concerns and marked several spots with the deadly duo of mighty black marker and spectacular green spray paint. Our communication issue was simply the result of our preference to use email to leave no room for misunderstanding, and his dependence on phone calls as the preferred communication method. He has a Blackberry and with over a hundred phone calls a day, emails get pushed way down so he doesn't see them until much later when using a computer. So if we need something, call, very simple and straight forward..
As for the Radon concerns we received a call from our SR's manager who basically said that Ryan Homes doesn't offer any Radon mitigation options as they don't want to be liable for it or its maintenance or success or failure to address any Radon that maybe present in a home. Thus, the general blanket disclosure that RH is not responsible for any naturally occurring substances, gases, or materials. The manager said that providing such options would imply assuming responsibility for its presence or consequences, and of a particular concern are possible health issues...
We understand that this makes sense for RH from a business and liability perspective, but as a personal concern we don't accept that they don't allow us to install a pipe in the gravel before the basement floor is poured just in case.. It doesn't have to be called a Radon mitigation pipe, it's just a pipe the owner wanted for whatever reason.. But that ship has sailed on.. At least we have the internal PVC chase we paid for in the dead space. The chase can be used for Radon mitigation if needed. We hope we never need it..
We are also keeping an eye on water on the basement floor possibly entering from rear wall of the family room where water has pooled due to a spectacular amount of rain.. Our PM said that the water is the result of the GFI tripping and sump pump stopping which resulted in water overflowing into the floor. But he said we can keep an eye for the next couple of weeks to see if there is any more water, which he is confident will not happen.
Plumbing and Electrical are done. Basement has a concrete floor now and so does the garage. Insulation is done. Savvy readers familiar with the process may realize an "Aha! Moment" here. Drywall is stocked in the house and ready to be installed perhaps 7/9. Siding was finished on 7/8 and it looks great. The brick for the front of the house has been in progress for over a week but only the garage and bonus bedroom are done.. the rain is not helping much. When I asked the brick layers if they'll finish today, he gave me an exhausted you-must-be-crazy-look and said, "My friend. It's a big house! Maybe next week."
Finally... the reason for this post is to say we had a posthaste predrywall meeting on 7/3. It came out of the blue as we were expecting much later. We spent about two hours going over the house and pointed out a few minor things. Mr. PM is very good and that's the truth, most of what we pointed was stuff that the trades missed even though it was clearly communicated to them.. But should be addressed before drywall.
Another reason for the lack of posts was waiting for something major to to post.. Perhaps that brick front, which will in a few minutes be on day 9 now. We selected Cagles Mill - Queen, but by God it looks dark velvet red, like red red wine.. Much redder than we expected. We will like it whatever it is, but this just goes to confirm the common knowledge that what you see in the RH design center is never identical to what you end up getting. We shall see in a couple days.. or more, "My friend, it's a big house."
Sunday, July 7, 2013
Ryan Homes Flooring and Stairs Explained. Rite Rug Redeemed
Post updated and due to popularity (most visited page on blog due to severe lack of Ryan Homes Flooring information elsewhere). Originally posted in May 2013 when we had a tough
experience with the flooring, which we wrote about. I forwarded the link
to our SR. He forwarded it to his manager... who forwarded it on and
on.. by the end of the day it had reached the head of RH in the
Cleveland area and the head of RR (flooring company) in Ohio..
Later, my SR would explain that there is an entire department at RH that is dedicated to monitoring blogs and Internet customer feedback about RH. RH seem to value their image beyond belief and truly care about meeting and satisfying the needs of their customers. From what I have seen they strive to correct any issues and address any negative feedback. Very impressed..
After forwarding the blog post to my SR, I saw the number of hits for that blog entry go into the stratosphere.. So I edited it and removed the actual conversation that took place at RR and reworded the bulk of the post to lessen the impact on anyone who could have provided better service. I really did not want to get anyone in trouble.
Within two days I received a phone call on my cell from the President of New Construction at RR. I was floored (no pun intended, being a flooring company and all)! He apologized that we did not receive superior service at one of their dedicated RH flooring design centers at RR. He offered to meet us at the RR location to show us the products and answer any questions, but I indicated I had already seen the products and did not want to trouble him with a trip from Columbus to Cleveland just to show me the options.
He was very professional and very attentive and wanted to know what could he and RR do to help us out. Someone else may have requested free flooring upgrades and what not, I am no saint and the idea crossed my mind.. But that was not why I wrote my initial entry about the negative flooring experience. I explained that all I wanted was what I did not receive, which is information about carpeting and padding to allow me to make choices. So here is what he explained..
Pads:
Standard: 5lb pad: It is 3/8" thick. Recycled and bonded material. He strongly recommended upgrading it.
Upgrade 1: 8lb pad: Antimicrobial treated to prevent mold/odor, and it has a spill guard membrane. It is 7/16" thick. Recycled and bonded material. Made by Carpenter, private labeled for RR. 10 or 25 years warranty or life time, cannot remember.
Upgrade 2: 8lb memory foam pad: Antimicrobial treatment that helps prevent odor causing mold, mildew and fungus. It is moisture resistant. Made from Memory foam with recycled and bonded material. It is 7/16" thick. Made by Carpenter, private labeled for RR. Lifetime warranty.
He recommended the 8lb memory foam pad for any family with pets as it is the most durable against spills and accidents, but was very truthful and straight forward in recommending the cheaper 8lb pad without memory foam for families without pets. Simple as that, and saved me a ton of money.
I walked on those pads at RR.. the standard 5lb is crap in all truth. The 8lb memory foam felt a tiny little bit nicer than the 8lb upgrade, but not too noticeable.. See bottom of post for further discussion.
Carpets:
In answering my question about not seeing a difference between standard Carpet A and Carpet B which is the first upgrade, he indicated that the only difference with upgrading to Carpet B is the R2X Shaw stain and soil resistance in B. They are both 25oz face weight and are very similar. He said Carpet A is sufficient for upstairs and the bedrooms and low traffic areas. He said if you are selling the house within 5 years or so, get Carpet B, clean it before you sell and you are good to go. If you plan to live in the house for a long time then the best first upgrade has to be Carpet C for comfort, looks, and longevity.
He was with me on the phone for half an hour explaining various options in details and really took his time to make sure we did not have any lingering questions. I was stunned by the attention to details and was in awe by how simple and truthful the answers were. He absolutely did not try to oversell. He explained what the marketing lingo really means and what is really needed for various situations. He spoke about personally dealing with RR employees and providing better training and taking the necessary measures to ensure that future RH customers visiting RR will not have similar issues. At the end he gave me his cell phone number and urged us to call if we had any questions or issues. I could not be more happy. RR is more than fully redeemed in my book!
Our final flooring selections were:
Carpet A in the whole house in the standard carpeted areas, except the family room where we practically live so we upgraded to Carpet B.
The revelation came while enjoying lunch with the family my 4 year old was eating and rice was flying around into the floor like a tornado, and my 2 year old was swimming in sauce.. I looked at my wife and said, "you can get the most expensive carpet in the world and nothing will save it from these two... We need ceramic in the dining room. We need ceramic everywhere"
We used Upgrade 1 with the 8lb Pad in Zone 2 upstairs and the family room downstairs, and standard 5lbs pad in living room, dining room, and office.
We selected resilient (vinyl) flooring for all other areas because we really did not like the ceramic choices, and we had thoughts to replace some later with the hardwood looking porcelain tiles we saw at Lowe's.

6 Months Later Update:
This is a 6 Months later update is based on question and answer below. As detailed above we have two different kinds of padding, the 8lb upstairs and in family room, and the standard 5lb in living and dining rooms and office. Without a doubt the 8lb is the way to go. You can absolutely feel the difference when walking over the better padding vs. the standard padding. We are pleased with our 8lb choice. Also, the 5lb feels cheaper and made of smaller separate parts (scraps) than the 8lb which feels like more continuous pieces were used.. We do not have memory foam anywhere, so I cannot speak about that other than the trials at Home Depot and Lowe's.
Just yesterday, however, we were commenting that just 8 months later, the baseline carpet upstairs looks beat up and flattish.. the 1st level upgrade from that we we only have in the family room is doing slightly better, but not by much. There are six of us, no crawlers and no pets. I hope you find this helpful in making your choices. .


Note: Stairs section was a separate post but I combined it here for relevance.. Please visit original post for useful reader comments:
Important Flooring Notes for Later:
1. Home Depot will not install over existing pad. They must install their own.
2. Lowe's will install over existing pad in some cases, but it will void the carpet warranty.
3. Warranty: According to Home Depot and Lowe's and some manufacturer documentation I saw, to be able to claim carpet warranty you must show a proof (via receipts) that you had cleaned the carpet professionally once a year. So in other words, when it says lifetime warranty... It is, but most people won't be able to claim it.
4. I flat out asked Home Depot if anyone came claiming a carpet warranty, and the rep said no. At Lowe's the rep said he had seen it done.. I know most people will not professionally clean those carpets, and if they do they won't find the receipts when they need them.
5. RR will install over existing pad purchased from them through RH when purchasing the house, and warranty will be valid. No issues to worry about here if going back to RR in the future.
More about Pads and testing at Home Depot:
There was some negative sentiment about memory foam pads from a highly experienced rug installer I spoke with, something about it not bouncing back up quickly enough to protect the carpet. At Home Depot I did blind tests walking on a whole lot of covered pads and realized that 8lb was the sweet spot.. the 21lb rubber did not feel good. The Scotch guard 8lb 1/2 inch one felt the best.. and the Step ahead 8lb at 69 cents was very good too. The memory foam at 79 cents was also pretty good. The rest was awful. The traffic Master 8lb @ 49 cents was closer to the 6lb than 8lb in comfort and I did not like it. Here is a picture of the Home Depot selection.. At Lowe's the selection was rather limited..

Later, my SR would explain that there is an entire department at RH that is dedicated to monitoring blogs and Internet customer feedback about RH. RH seem to value their image beyond belief and truly care about meeting and satisfying the needs of their customers. From what I have seen they strive to correct any issues and address any negative feedback. Very impressed..
After forwarding the blog post to my SR, I saw the number of hits for that blog entry go into the stratosphere.. So I edited it and removed the actual conversation that took place at RR and reworded the bulk of the post to lessen the impact on anyone who could have provided better service. I really did not want to get anyone in trouble.
Within two days I received a phone call on my cell from the President of New Construction at RR. I was floored (no pun intended, being a flooring company and all)! He apologized that we did not receive superior service at one of their dedicated RH flooring design centers at RR. He offered to meet us at the RR location to show us the products and answer any questions, but I indicated I had already seen the products and did not want to trouble him with a trip from Columbus to Cleveland just to show me the options.
He was very professional and very attentive and wanted to know what could he and RR do to help us out. Someone else may have requested free flooring upgrades and what not, I am no saint and the idea crossed my mind.. But that was not why I wrote my initial entry about the negative flooring experience. I explained that all I wanted was what I did not receive, which is information about carpeting and padding to allow me to make choices. So here is what he explained..
Pads:
Standard: 5lb pad: It is 3/8" thick. Recycled and bonded material. He strongly recommended upgrading it.
Upgrade 1: 8lb pad: Antimicrobial treated to prevent mold/odor, and it has a spill guard membrane. It is 7/16" thick. Recycled and bonded material. Made by Carpenter, private labeled for RR. 10 or 25 years warranty or life time, cannot remember.
Upgrade 2: 8lb memory foam pad: Antimicrobial treatment that helps prevent odor causing mold, mildew and fungus. It is moisture resistant. Made from Memory foam with recycled and bonded material. It is 7/16" thick. Made by Carpenter, private labeled for RR. Lifetime warranty.
He recommended the 8lb memory foam pad for any family with pets as it is the most durable against spills and accidents, but was very truthful and straight forward in recommending the cheaper 8lb pad without memory foam for families without pets. Simple as that, and saved me a ton of money.
I walked on those pads at RR.. the standard 5lb is crap in all truth. The 8lb memory foam felt a tiny little bit nicer than the 8lb upgrade, but not too noticeable.. See bottom of post for further discussion.
Carpets:
In answering my question about not seeing a difference between standard Carpet A and Carpet B which is the first upgrade, he indicated that the only difference with upgrading to Carpet B is the R2X Shaw stain and soil resistance in B. They are both 25oz face weight and are very similar. He said Carpet A is sufficient for upstairs and the bedrooms and low traffic areas. He said if you are selling the house within 5 years or so, get Carpet B, clean it before you sell and you are good to go. If you plan to live in the house for a long time then the best first upgrade has to be Carpet C for comfort, looks, and longevity.
He was with me on the phone for half an hour explaining various options in details and really took his time to make sure we did not have any lingering questions. I was stunned by the attention to details and was in awe by how simple and truthful the answers were. He absolutely did not try to oversell. He explained what the marketing lingo really means and what is really needed for various situations. He spoke about personally dealing with RR employees and providing better training and taking the necessary measures to ensure that future RH customers visiting RR will not have similar issues. At the end he gave me his cell phone number and urged us to call if we had any questions or issues. I could not be more happy. RR is more than fully redeemed in my book!
Our final flooring selections were:
Carpet A in the whole house in the standard carpeted areas, except the family room where we practically live so we upgraded to Carpet B.
The revelation came while enjoying lunch with the family my 4 year old was eating and rice was flying around into the floor like a tornado, and my 2 year old was swimming in sauce.. I looked at my wife and said, "you can get the most expensive carpet in the world and nothing will save it from these two... We need ceramic in the dining room. We need ceramic everywhere"
We used Upgrade 1 with the 8lb Pad in Zone 2 upstairs and the family room downstairs, and standard 5lbs pad in living room, dining room, and office.
We selected resilient (vinyl) flooring for all other areas because we really did not like the ceramic choices, and we had thoughts to replace some later with the hardwood looking porcelain tiles we saw at Lowe's.
or how about a picture..
This is a 6 Months later update is based on question and answer below. As detailed above we have two different kinds of padding, the 8lb upstairs and in family room, and the standard 5lb in living and dining rooms and office. Without a doubt the 8lb is the way to go. You can absolutely feel the difference when walking over the better padding vs. the standard padding. We are pleased with our 8lb choice. Also, the 5lb feels cheaper and made of smaller separate parts (scraps) than the 8lb which feels like more continuous pieces were used.. We do not have memory foam anywhere, so I cannot speak about that other than the trials at Home Depot and Lowe's.
Just yesterday, however, we were commenting that just 8 months later, the baseline carpet upstairs looks beat up and flattish.. the 1st level upgrade from that we we only have in the family room is doing slightly better, but not by much. There are six of us, no crawlers and no pets. I hope you find this helpful in making your choices. .
Stairs
Stair
options for the Victoria Falls..
The house comes standard with carpeted
stairs (not hardwood with carpet runner). We were told that if we
removed the carpet then the pine stairs underneath would just not work
as it is not finished and can't be finished. I looked at them in a house
under constructions and they are rather hellish (but I saw a fellow
blogger post their during construction pictures and they looked OK). Mr.
SR said the hardwood stairs are shipped in full pieces and are extremely heavy and solid.
As I understand it, all stairs come with unfinished pine underneath. The standard option carpets those stairs, and gives you Oak Handrail and White Balusters. As for the bullnose our
SR just confirmed via email, "Yes, that's part of the upgraded stairs.
On the Victoria falls its just on the one side since the wall is on the
other. It looks nice." The upgrades are as follows:
I looked
up some you tube videos on installing hardwood on the stairs and it
seemed that is doable task given sufficient tools and time.. But those
stairs are of varying sizes and shapes.. And as J Grisby
points out, the Victoria Falls have multiple stair cases, "I just know
the stair case is pre manufactured. They screw it and glue it together.
There is absolutely no creak or groan emanating from my stair case."
This is exactly what I needed to hear. I double checked with my
professional handyman friend with over 30 years of experience and he
said that while it can be done afterwards, it will not be as good as if
RH installs it and may end up costing more..
In the
Victoria Falls the stairs really shine, one of the most astonishing
features of the house. Our SR couldn't show us a house that had them in
our development because none of the houses going up selected that
option, but he did say the stairs are very heavy solid hardwood. In the
model home (Courtland Gate) the stairs are outstanding, so after banging
my fists against them and hearing the super dense wood talk back in a
very muted tone, we paid the $2,700 to upgrade the stairs to hardwood
without carpet.
So.. here we go, it should look like so..
Note: Stairs section was a separate post but I combined it here for relevance.. Please visit original post for useful reader comments:
Important Flooring Notes for Later:
1. Home Depot will not install over existing pad. They must install their own.
2. Lowe's will install over existing pad in some cases, but it will void the carpet warranty.
3. Warranty: According to Home Depot and Lowe's and some manufacturer documentation I saw, to be able to claim carpet warranty you must show a proof (via receipts) that you had cleaned the carpet professionally once a year. So in other words, when it says lifetime warranty... It is, but most people won't be able to claim it.
4. I flat out asked Home Depot if anyone came claiming a carpet warranty, and the rep said no. At Lowe's the rep said he had seen it done.. I know most people will not professionally clean those carpets, and if they do they won't find the receipts when they need them.
5. RR will install over existing pad purchased from them through RH when purchasing the house, and warranty will be valid. No issues to worry about here if going back to RR in the future.
More about Pads and testing at Home Depot:
There was some negative sentiment about memory foam pads from a highly experienced rug installer I spoke with, something about it not bouncing back up quickly enough to protect the carpet. At Home Depot I did blind tests walking on a whole lot of covered pads and realized that 8lb was the sweet spot.. the 21lb rubber did not feel good. The Scotch guard 8lb 1/2 inch one felt the best.. and the Step ahead 8lb at 69 cents was very good too. The memory foam at 79 cents was also pretty good. The rest was awful. The traffic Master 8lb @ 49 cents was closer to the 6lb than 8lb in comfort and I did not like it. Here is a picture of the Home Depot selection.. At Lowe's the selection was rather limited..

Monday, June 24, 2013
Ryan Homes Driveway Expansion and "$300 Concrete Guy"
[Rewriting for clarity]... Our old house had a strangely shaped driveway and this time we wanted an idiot proof driveway. All homes here have side entry garages. Last phase (Covington) 12 feet wide driveways were the standard, and 16 wide in our phase (Palmer). Parking pad is 27x18 for 2 car, and 27x27 for 3 car side entry garages. Hopefully wider driveways may cut down
on street parking.
Going over blogs, many people wrote, "pay the concrete guys 300 bucks on the side to make the driveway wider." Well, folks, I am not sure whether this works for many people besides the guy who came up with it. Here there are inspections for just about everything, including concrete, which from what I understand has to match the topographic design created by the engineer, which includes the driveway.. So the driveway has to be written into the contract and paid for up front..
We wanted both sides of the driveway to be even and symmetrical from start to finish (standard is 16 feet at sidewalk gradually widening to 20 feet at pad).. So we asked to widen the driveway and agreed to pay for it. An initial design increase to 18 was pretty good, but then I ran into the driveway guy website and became convinced I needed a 20 foot wide driveway. So we we asked our SR to change to that and he kindly changed it.
Curse you Google maps for giving us costly ideas.. Thus born the hammer head extension, which allows for reversing into, then correcting and driving straight into the street, instead of reversing all the way down (grass knows our driving skills, and trembles in fear every time we get in a car). The typical hammer head is 10x12. To allow us to park our van and keep it out of the way we made the hammer head 10x18.
Looking some more at Google maps for similar hammer head driveways convinced us to to go back to our extremely helpful and patient SR and requested changing the 10x18 hammerhead to 20x20, and promised this would be the last change.. Maybe we can park two big cars without losing an inch of parking pad space, and to maybe it will also double as a basketball court... It is a big family.
Final dimensions are: 24 ft wide at apron, 20 ft wide driveway. 27x18 parking pad extending into a 20x20 hammer head. Distance from apron to end of hammer head is exactly 98 ft.. Or 88 ft from side walk.. At over 2,000 sqft, this monster covers about 12% of the lot, certainly larger than the house.
So when the final topo came back from the engineer, our SR sent the topo below with one sentence "you could land a plane on this!" Also in preconstruction meeting our PM commended widening the driveway and the hammer head and said that we would totally find it worth the investment and would pay off in added convenience.
This is what we traded the fancy fireplace for. I just wish we had made the hammerhead extend all the way to the house...

Thursday, June 20, 2013
Roofing a Completed Frame
Since last week the framing has been completed. AAA for speed without a doubt, but I have seen some quality issues. We 'get it.' This will not be built as finely as if we did the work ourselves, but I was hoping for better quality control.
There were lots of cracked/broken/half rotted pieces of wood that one would think would be replaced, along with some obvious spaces in the framing were it really should be flush. I have an ex-coworker who is now a custom builder in the area, and I know from a friend who built with him that he would return any piece of wood that was not perfect, He is also much more expensive..
Marvin and his Amish CT Construction crew were framing the house next to us when I stopped by to thank him for what they have done with our house. He said, "You got a roof today." And lo and behold, I look up and see that we have a roof indeed! It looks very black and sharp, don't know how else to describe it.
We also met the neighbors building the Courtland Gate being framed next to us (visible in one of the pictures below, the house not the neighbors). Very nice people and hail from far-away-lands-across-the-ocean like us. We exchanged some ideas and information, along with our off-track build schedule. It was a pleasant meeting all together and very nice folks, very glad to have them as neighbors.
Basement gets poured tomorrow, assuming ground works pass inspection today. I wonder if many people read all this gibberish or just skim through the pictures. So here is a sentence to test that, "Not thrilled with the level of communication at the moment. Emails to PM seem to go into a black hole. Didn't get a weekly update last week either. I get that RH has him building a bazillion homes and he is busy and we may sound like whiny children for a Master Builder who's built hundreds of homes and has seen it all before (meant truthfully, no sarcasm involved, the man is nice and easy to work with, and provided us with the most comprehensive build schedule anyone but PMs have ever seen). But we are bleeding to pay for this home, and we would not complain without cause. There is a higher than EPA recommended level of Radon in this Palmer Village development that Ryan Homes does not address (of course they have a blanket disclaimer in all agreements about not testing for or being responsible for naturally occurring gases and materials). Ryan Homes will not help us setup a pipe under the basement slap for future use in a Radon Mitigation system in case it is found in our home, even when we offer to pay for it ourselves." So there goes..
and here are some pictures..


Friday, June 14, 2013
Framing Day 4
The rain from the storm did not seem to have an adverse affect on the house. As many have kindly pointed out, "if it will rain it will rain, and if there is damage it will be fixed, and there isn't much one can do about it, and it happens to all houses." So We are grateful God saved this little house from damage. There are pools of waters outside, and lots of mud everywhere from the framers going in and out, but that's expected. Marvin, the team lead said they will be close to done on Friday, but will need one more day.
The surprise of the day was seeing that they had framed the skeleton for the bonus bedroom, and we found that it makes a major change in house the house looks. It is also much larger on the inside that we expected.
The surprise of the day was seeing that they had framed the skeleton for the bonus bedroom, and we found that it makes a major change in house the house looks. It is also much larger on the inside that we expected.


2nd floor panorama from our favorite room, bedroom 4 with an extra window

bonus bedroom

and a shot from the basement into the heavens..
Subscribe to:
Posts (Atom)